
With cooler weather comes the urge to build a campfire! Here are four delicious recipes to make over your next campfire: Fireside Popcorn, Hot Dog Kabobs, Banana Boats, and Pie-Iron Pizza Pockets. Get the step-by-step recipes and shopping lists below!

Popcorn is light to pack and endlessly versatile. There are multiple ways to pop popcorn over a campfire, from a cast-iron pot to simple aluminum-foil packets. Try this colander method, which doesn't require any oil.
One tablespoon of popcorn kernels will yield about 2 cups of popped popcorn, so estimate how many cups your stainless-steel colander can hold, then place no more kernels than will fit once popped in the bottom of the colander. Cover with a fire-safe lid or seal the top with aluminum foil, tenting it a bit if possible. Place colander on the fire’s grill, just outside the reach of flames. It can require quite a bit of heat for the popcorn to start popping, so if it doesn’t begin to pop after 5 minutes, build up the fire to increase the heat.
Meanwhile, place clarified butter in a small fire-safe pot. Set close to the edge of the fire to melt. Once popping slows, use thick fire-safe gloves or tongs to carefully remove colander from fire and lift lid/foil. Pour popcorn into serving bowls, drizzle with melted butter, and sprinkle with salt.
*Clarified butter (ghee) can be found in the pantry section of the grocery store. Unlike regular butter, clarified butter has been heated to remove water and milk solids so it won't soak into the popcorn and leave it soggy. As an added bonus, it stays solid at temperatures below 87 F, making it easy to pack in spring and fall. Liquid butter toppings found in the popcorn aisle will also work.

You’ll want to do a little advance work before heading to the campfire for this one.
Before heading to the campfire, mix together the barbecue sauce through chili powder in a packable container with lid. If using wooden skewers, soak them in water for at least 30 minutes before assembly to prevent burning. Build skewers by alternating hot dogs, pineapple, peppers, and red onion. For metal skewers with wooden handles: Hold above the flame, rotating regularly. For wooden skewers: Lightly coat both sides of kabobs with nonstick cooking spray. Place an inch or two apart on a metal grate above the fire. When the first side is roasted, use gloves or tongs to flip kabobs and roast the other side. Brush with sauce and enjoy!

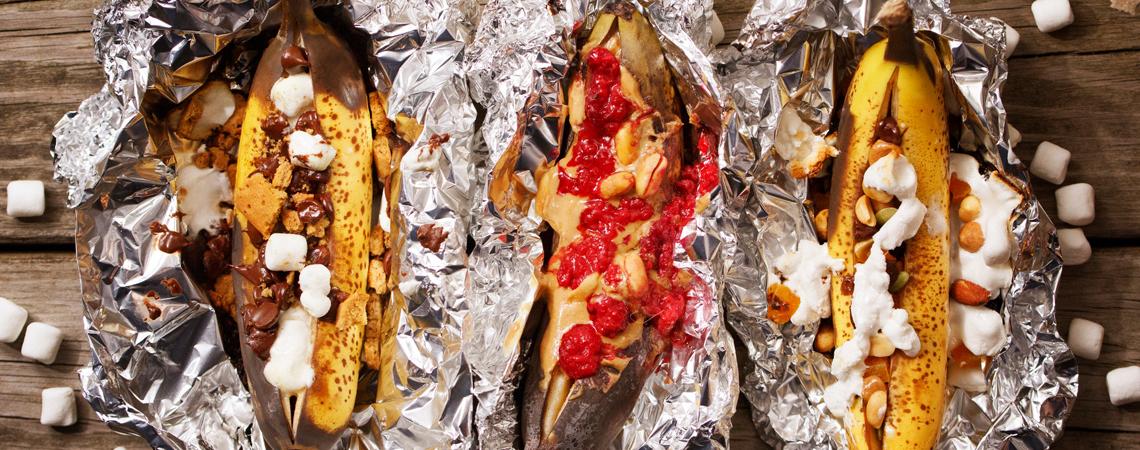
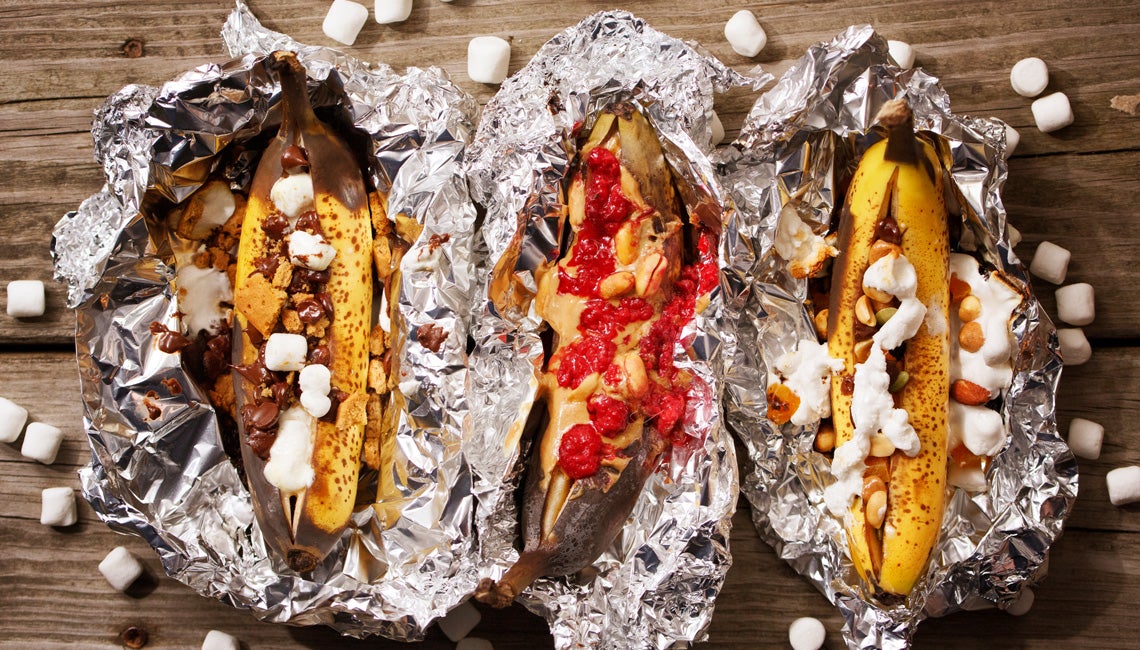
Banana boats are incredibly simple to make. Cut a slit lengthwise down the middle of the peel on the concave side — not all the way through, but until the tip of your knife just grazes the peel on the other side. Pull the peel and banana slightly apart. Place banana diagonally, pointed ends up, in the middle of a sheet of aluminum foil and mound desired toppings in and around the sliced opening of the banana. Pull sides of foil up so the corners are touching, then crumple-roll the foil down just before touching the toppings, then crumple-seal the short sides as well. Repeat with the other bananas.
If your fire is blazing bright and hot, place boats crimp-side up onto a grill grate to heat. If your fire is down to glowing embers, nestle the pouch inside the embers. Check after 2 minutes and adjust cooking spot if needed (closer or further from heat). When cooked to your likeness, remove from fire with tongs or gloves, place on a heat-safe plate or bowl, and carefully pull back foil. If banana is steaming, let sit for a minute to cool, then eat with a spoon!
Suggested toppings: trail mix, granola, fresh fruit, dried fruit (jam works, too!), chopped nuts, peanut butter, chocolate chips, chopped chocolate bar, mini marshmallows, torn marshmallow pieces, crumbled cookies or other baked goods.

A pie iron is a campfire cooking tool consisting of two cast-iron plates hinged together with long handles. They typically come in two sizes: 4x4 and 8x4 inches (shown).
Open pie iron and lay both sides on a flat surface. Coat the insides with nonstick spray. If necessary, cut bread slices to fit the size of the pie iron. Butter the outside of one bread slice and place butter-side down in pie iron. Spread sauce on top, then sprinkle cheese and add toppings. Butter outside of another bread slice and place on top.
Close pie iron, keeping bread and toppings tightly inside while aligning the two plates. Lock handles together with the metal S-hook. Pick up pie iron by both handles and scope out a spot in the campfire — low down with a mix of embers and flames will provide even heat and toast the bread. Ensure the iron is stable and handles are well outside the fire before stepping away.
Cook time varies. Be prepared to check on the pie’s progress with heat-safe gloves and a pair of tongs at about 5 minutes. The goal is evenly toasted bread on both sides, with steamy melted cheese inside. If the butter and cheese are melted but the pie isn’t toasting, move it to an area with direct flame. If the bread is toasted but cheese isn’t melted, move down to the embers. If only one side is toasted, flip it so the uncooked side is closest to the heat. Just as with grilled cheese on the stove, the second side cooks faster than the first.
Once toasted, carefully remove from fire and place on a heat-safe surface. Unlock the S-hook and slowly open the iron. With tongs, transfer pie to a plate. It’ll be HOT! When using an already-hot pie iron to make another pie, expect the cook time to be less than half of the first pie.


